Configuring a great App Store page is usually one of the last stages in the app development life cycle. Because it comes at the end, it is sometimes overlooked, or the information is added in a slapdash sort of way, without much time or attention dedicated to the content.
However, even if you have created a great app, no one will find it if you don’t put some thought and attention into the screens on the Developer Dashboard that make up your App Store page. And even if by some sheer stroke of luck, a few people manage to find your store page, if what they see and read doesn’t convince them to download your app, all your efforts will have been for nothing.
Two key aspects of configuring a winning App Store page are getting the pricing and the availability right.
The price of your app can make it more or less appealing to users, depending on who your audience is and what platforms (iOS or Android) you release to.
And availability of your app can also affect your sales and analytics results. If you release to too wide an audience when your app hasn’t been tailored for all locations, you may hinder your app’s progress.
You must find that balance and use your findings to guide how you configure your App Store page.
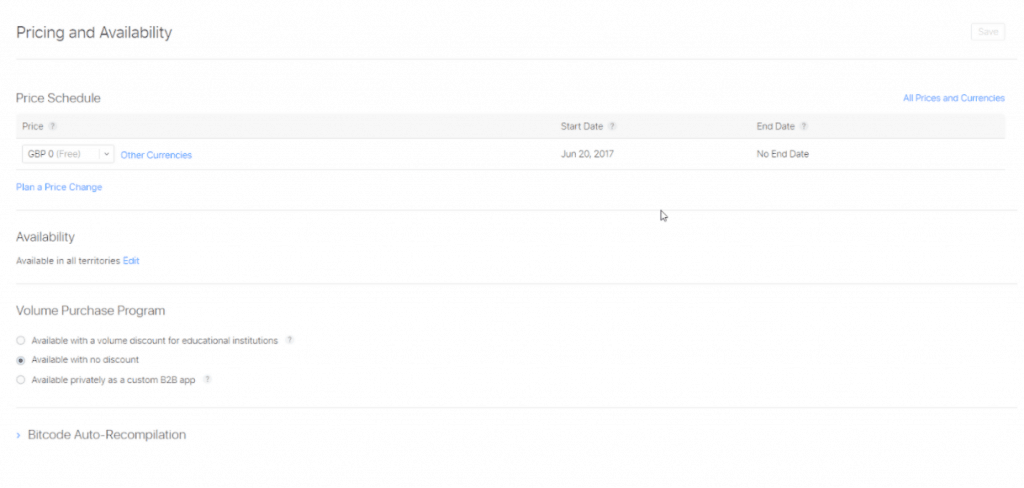
In this post, we’ll delve into how to set Pricing and Availability—as shown below—in a way that gives your app the best possible start in life.
You’ll learn to set up the price, set up a price change schedule (if necessary), and set the availability of your app.
Setting Your Price
You should already know from your chosen business model whether you want to sell your app for a fixed cost or price it as free. You would have gained all of this information from the idea validation and research stages of development, and from audience feedback and competitive analysis.
We tend to equate price with quality, so your initial instinct may be to price high and at a fixed cost. This strategy has been known to work on the Apple App Store, as the typical user of iOS devices prefers high quality. But if you try to use the same technique on Google Play, you may find that users are less likely to buy your app. This is because apps in the Play Store usually sell for lower prices or are free, without this being indicative of their quality.
Please be aware that if you decide to sell your app, you must have a Paid Application agreement.
What is a Paid Application agreement?
The Paid Application agreement is a contract you have to review in order to sell apps. You don’t need to submit anything to Apple in order to be compliant with this agreement. It’s simply an online form that you complete with the necessary bank and tax details.
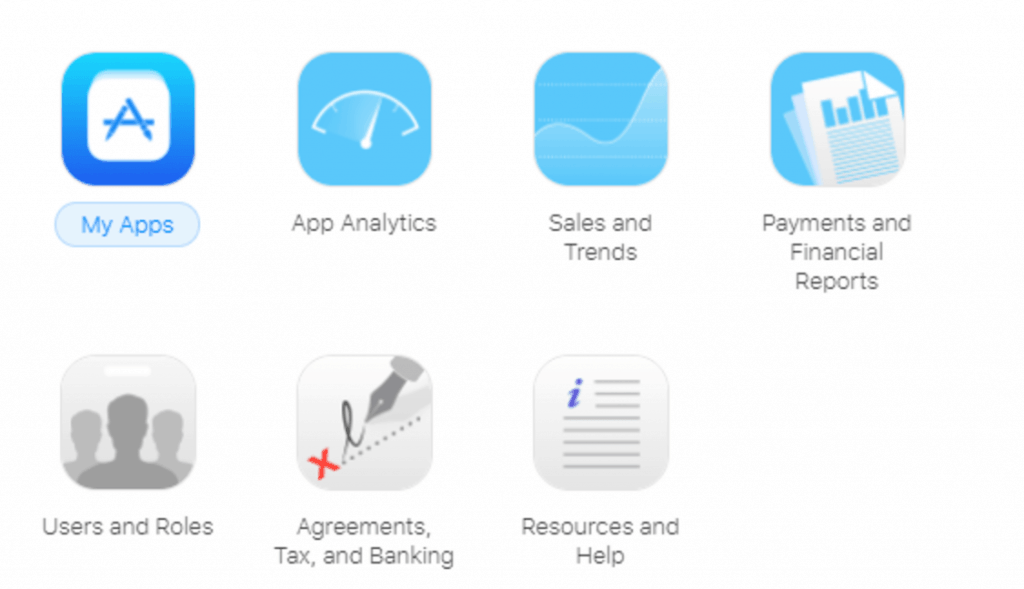
In order to review the agreement, sign into the Apple Developer Account page and select Agreements, Tax, and Banking.
Under Request Contracts, click Request for the iOS Paid Applications contract type. An agreement will appear.
After you review the agreement, check that you have read and agreed to the contract, then click Submit.
The iOS Paid Applications contract will now be displayed under Contracts In Process. You then need to set up your Contact Info, Bank Info, and Tax Info in order to get your sales paid into your account.
For further steps on the Paid Application agreement, please read this step-by-step guide.
What’s the best price for my app?
Only you can decide that, but there are things you can research to guide your decision. Look at similar apps currently on the App Store to help you figure out an appropriate cost for your app. If you can, try to find out how many downloads these competitive apps have had. When pricing your app, take into consideration how long it took you to create your app and how much effort you have put into creating it.
Get feedback from your target audience to gather their opinions about what they would pay for your app. Ask strangers for their opinions over direct friends or family. Strangers won’t care so much about your feelings and are more likely to give you their honest opinion and thoughts. If you’re not a social butterfly, talk to friends of friends, colleagues at work, or online users via groups such as Facebook groups or forums. Ask these people a specific set of questions that will help you justify your price model.
Use the feedback you gain from your target audience and competitive analysis to come up with a price that’s suitable for your users.
Before you set your price …
You should take a look at the All Prices and Currencies link, which takes you to the pricing matrix that details the pricing tiers for each territory. A territory is a country where the Apple App Store can distribute apps.
Pricing tiers are what you use to set your app price. Each tier is of a different value. The lowest tier is Tier 0. This is the tier you select if your app is going to be priced as free.
There are 87 pricing tiers and seven alternate tiers available for you to pick from. The pricing tiers are set by Apple, and they vary across territories.
How do you set a price?
In the Price Schedule section, you will see that you already have a default value set to Tier 0. The Start Date will be today’s date, and the End Date will be “No End Date.”
Select Plan a Price Change to change these defaults.
You will then be presented with a table where you can set the Pricing Tier, Start Date, and End Date for your pricing change.
The Start Date is the date that this new price will come into effect on the App Store. The price changes at the beginning of the day. To make the price change immediately, select “Today.”
The End Date is the date that this price reverts back to the prior value (if you’re setting it for the first time, this will be the default of Tier 0). Selecting “No End Date” will set this price permanently. Prices change at the start of the day. One-day sales have to end at the start of the next day.
Promotional Pricing

You also have the option to configure any promotional pricing periods. For example, if you have a launch price of 99p (or USD $0.99), then you can schedule this so that after a month it increases to £1.99.
Price changes and promotional offers are something that are good to have planned prior to configuring your App Store page.
It’s important to understand how to use price changes to build up scarcity by lowering the price for short periods. But you must be careful, as many users equate price with your level of quality. Ensure your full price reflects what you think is the accurate value of your product.
A good example would be to run a Summer Sale promotion and cut the price of your app by 25 percent for one week. By advertising that the sale is only on for a short length of time but not stating when it will end, your app may get more downloads, as buyers will be uncertain when the original price will be reinstated. However, if you do feel compelled to advertise a certain time period, don’t state anything longer than three days. If you do, buyers will think they have time to come back to it later. The next thing you know, more than three days have gone by, the sale is over, and those who were keen on downloading your app are no longer interested, because they didn’t get a reminder that the sale was ending. Again, make sure you plan this carefully.
Keep in mind also that too many price changes may lead users to believe that you don’t know what you’re doing or that your product just isn’t worth the higher price. Also, if your users know your app frequently lowers in price, they may decide to strategically wait until it drops, in order to get a bargain.
Lay out a plan for when and why you will schedule a price change. Use your marketing channels—Facebook page, website, et cetera—in order to properly communicate these changes. If a special occasion like Christmas is coming up, consider lowering the price for a set period and posting when you’re having the sale.
Availability
Availability is where your app will be available. Setting this means you determine which territories your app will be available in. You can select individual options from the 155 territories currently supporting the App Store or by choosing Select All, which will highlight all territories.
Yes, you may think that in order to get the most amount of traffic, you should make your app available to the maximum amount of users. But if you plan to serve only a specific market, or are releasing your early versions to gain feedback, you may want to limit your audience to certain territories.
Companies like Supercell are known to carry out this type of strategy. They frequently do soft launches in Canada to test their ideas and see if what they have just created is a hit, is a miss, or needs a bit more work. If they have a hit, they then open the app up to all of the other territories. If not, they move on to the next idea. Their soft launches differ in length of time, and in whether they release to iOS and Android simultaneously, or one following the other if the initial release receives good enough results.
Volume Purchase Program
This program gives certain groups, like academic institutions, the option to gain a discount when purchasing large volumes and multiple copies of your app.
If your app targets clients that have multiple devices, you may want to have this option. Places like schools and businesses have multiple smartphones and portable devices; therefore, every device would have an individual app. Giving a discount could encourage your clients to buy your product.
These are the options you can choose from in this section:
- Available with a volume discount for educational institutions
- Available with no discount
- Available privately as a custom B2B app
Bitcode Auto-Recompilation
Bitcode refers to the type of code that is sent to iTunes Connect. This is known by its full name of “LLVM Bitcode.” Sometimes Apple automatically rebuilds apps that include bitcode to improve hardware support or optimize Apple’s software—for example, to downsize executable sizes. If Apple needs to alter your executable, then they can do this without a new build being uploaded.
If you want to retain full control of your app, you can opt out of using bitcode. To do this, select the option: “Don’t use bitcode auto-recompilation.” Checking the box means that you have opted out of having your app auto-recompiled.
However, you may want to consider granting permission of this feature. If you disable bitcode auto-recompilation, a few things may happen:
- Your app may be unavailable for some devices.
- Your app (including when it’s within an app bundle) may become unavailable whenever apps must be recompiled.
- If your app is unavailable on the App Store, then Universal Purchase, re-downloading, and Family Sharing won’t work unless all platform versions have been approved.
To make sure your app remains available on the App Store, you need to upload a new build of your app that contains bitcode, test it, and submit that build with a new app version to App Review.
To read more about bitcode, see Apple’s support page.
Where to next?
You now have a thorough understanding of how to set up pricing and determine where your app will be available.
In this post, I’ve taken you through:
- Pricing tiers and how to set a price for your app
- The reasons you might choose to make your app free or sell it at a fixed price
- Paid Application agreements
- Promotional pricing
- Apple territories and availability
- The volume purchase program
- Bitcode auto-recompilation
Your App Store page is beginning to take shape.


