During the first two posts in this series on how to release your app to the App Store, I discussed the importance of configuring the first two screens of your App Store page.
In Releasing Your App to the Store in Style Part 1, I stepped through the App Information screen and why each setting (for example, the title and category) is important to help drive more users to your page.
In Releasing Your App to the Store in Style Part 2, I discussed how the price and where you make your app available could affect your sales, and also how you could use this to help with trialing your app on a smaller audience.
In this post, we’ll discuss what you need to configure before you can finally submit your app for review to Apple, before you plan for that all-important release date.
We’ll discuss each section of this screen in the order that they currently appear so you can read through this post and the screen at the same time from top to bottom without having to jump back and forth.
Let’s go!
Version Information
This section gives prospective users a first glimpse at your app. Sure, the icon may have drawn them in, but you need to have your best images here. If your images aren’t high quality, they will not convince viewers to download your app.
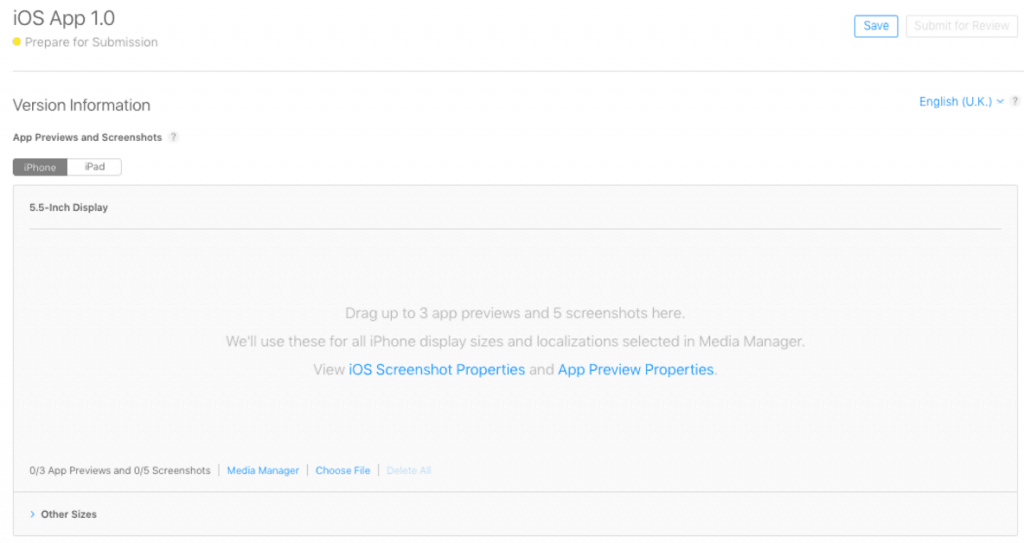
App Screenshots
For the current generation of Apple products, if your app runs on an iPhone, you must provide screenshots appropriate for a 5.5-inch display. The Apple guidelines state that “screenshots must be in the JPG or PNG format, and in the RGB color space. App previews must be in the M4V, MP4, or MOV format and can’t exceed 500 MB.”
You will upload screenshots for both iPhone and iPad in this section. If your app supports both iPhone and iPad, you need to add at least one screenshot for iPad. You are allowed up to five screenshots for iPhone and five more for iPad.
Read iOS Screenshot Specifications for more information on the guidelines you need to follow when creating your iOS screenshots.
Screenshot Options
You have a few options available when managing your screenshots in this section.
Media Manager
This option allows you to upload individual sets of screenshots for each iPhone or iPad size. You can also make any one device use the default 5.5-inch display screenshots by checking a checkbox next to each device section.
The benefit here is that if you have different designs for different devices, you can showcase both on the store to your users. A small downside is that it may take a little while longer to gather and format the screenshots to the correct sizes. But if you went to the trouble of creating new designs, why not put in the extra effort to make sure they’re seen by as many people as possible?
For more information about the Media Manager, read this Get Localization post.
Choose File
This option allows you to select the images you want to use for screenshots from your file system.
Delete All
This option will remove all screenshots and any App Preview files you have added to the 5.5-inch display section. It’ll save you from having to remove them individually. Being able to remove everything at once will be useful if you have updated the graphics of your app and want to change them all.
App Preview
An App Preview is a short video users watch right on the App Store that lets you demonstrate the features and functionality of your app. You are allowed only one app preview.
This preview video is a great marketing tool, but don’t do it if you can’t create a high-quality, effective video that equals the brilliance of your app itself. Users may overlook your app if they’re turned off by the video.
If you really want to make a video, but don’t have a large budget to hire someone, please, do it yourself only if you know you can produce something spectacular. If the video is low quality, that indicates that your app could also be of low quality. And that’s the last thing you want.
One idea for those with small budgets is to look for contractors on Fiverr. Most jobs start from £5 (extra services may increase the price, though) and you can get a few free revisions included in that cost to tweak your project if you’re not happy straight away. Just remember that the devil is in the details. The more details you provide, the better your chances will be that your first version comes back close to what you are happy to use.
In addition to being high quality and well-made, it needs, above all, to be short. Time is money, so make sure your star features are showcased quickly in your video. Between 15 and 30 seconds should be your target range. If you think your video may be too long, try it out on a few people and get their opinions before you spend time reducing the length.
Read App Preview Specifications for more information on the guidelines you need to follow when creating your App Preview.
Other Sizes
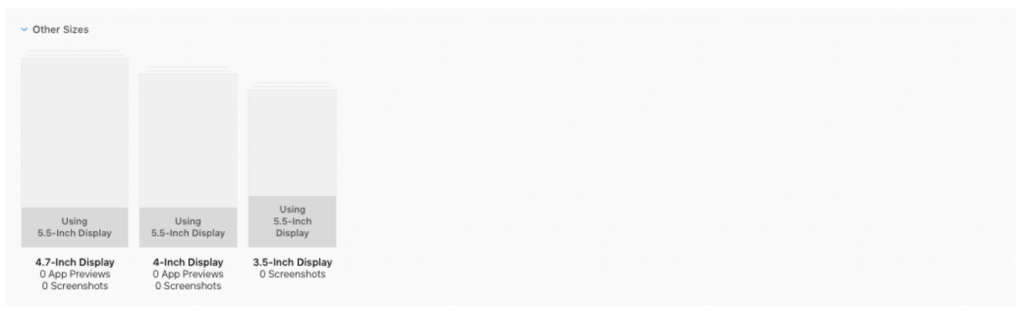
When you add in your iOS screenshots for the 5.5-inch display, these will be resized and used for the other sizes: 4.7-inch display, 4-inch display, and 3.5-inch display. Again, the benefit here is that if you have different designs for different devices, you can showcase both to your users on the store.
To add custom screenshots to the Other Sizes section, go to the Media Manager.
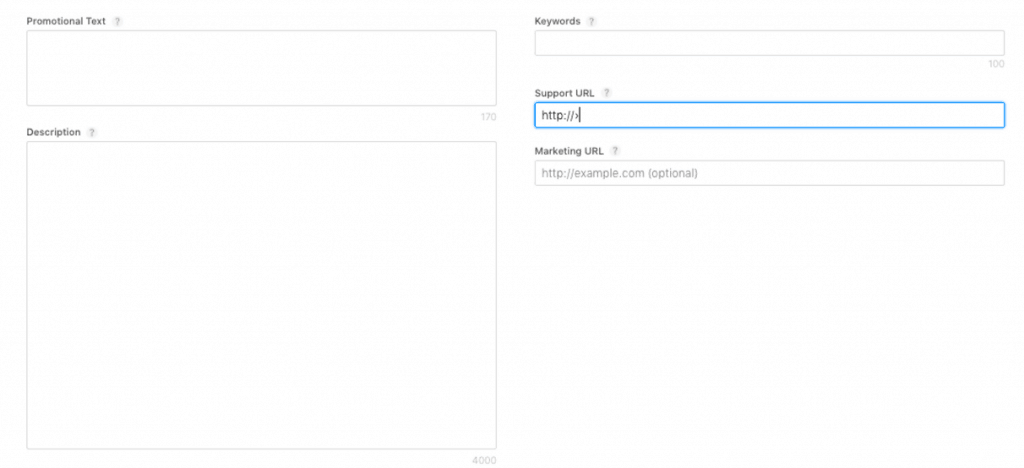
Promotional Text
Waiting for your app to be reviewed can take up to a week if you’re a new publisher to the Store.
However, promotional text gets updated to your App Store page straight away, bypassing the submission process. It lets you inform visitors to your page of any current app features quickly.
This text appears above your description on the App Store for those with devices running iOS 11 or later.
Description
After the images, the description provides the user with the greatest insight into your app and its features.
Overloading the reader with every little amazing feature your app has is not the best strategy. Giving someone too much information may leave them bored by the time they get to the end (if they don’t lose interest and switch to something else halfway through).
And giving them something too short may not intrigue them enough to download your app and see for themselves.
You need to find a balance where you deliver the best information in a short, snappy pitch. List your best features to catch the attention of those that skim-read.
This description will also be used for your Apple Watch app, so you may want to keep it as short as possible. It really depends on whether you mind having users scroll to read the full description in their Apple Watch.
You also need to be thoughtful in the words you use to describe your app. Use keywords in your description you think a potential user will search with to make it more likely that your app will show up in their search results.
Keywords
This field is like the description in that you fill it with keywords. However, unlike the description, you can put in words that you wouldn’t use to describe your app, but users may search with. For example, the Google Sheets app doesn’t contain the word “number” or “calculation” in its description, but as users are familiar with associating these words with this tool, they may use them when they search for that app.
Make sure you add at least one keyword into this field to improve the chances of your app being listed in search results. Separate your keywords with a comma. (No need to add a space! You’ll just be wasting precious characters.)
Picking relevant keywords for your app has become as important and as much of an art as picking the keywords for your website. For this reason, choosing your keywords now has its own name: App store optimization or ASO. Tools like Google Trends and Google Keyword Planner will help you figure out what terms users are searching with the most so that you can find the relevant keywords to add into your app to ensure it appropriately turns up in the most search results.
ASO can be incredibly complex; the best keywords to use will depend on your app. I suggest that you spend a bit of time on trying to select the best keywords using the tools I described above to get you started.
Support URL
Visible on the App Store beneath your description, the URL tells users where to go if they need support information for your app.
Marketing URL
Also visible beneath the description, this URL tells users where to visit in order to gain marketing information about your app. For example, you may want to provide more in-depth information about the features of the app, the background of why and how it was made, any information about you in relation to the app, etc.
iMessage App
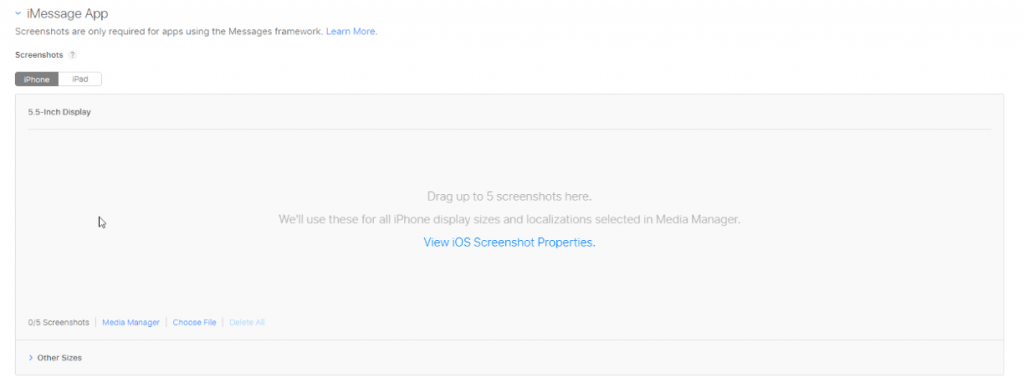
The iMessage App allows you to create an app extension that lets your users interact with your app within Messages, extending the functionality of your app. Users can interact by creating and sharing content, adding stickers, making payments, and more, without ever leaving their conversations.
The iMessage framework is available in iOS 10 or later.
You can add screenshots to your iMessage App extension here in the same way as the iPhone and iPad version detailed above.
Read the iMessage page for more information about iMessage.
Apple Watch
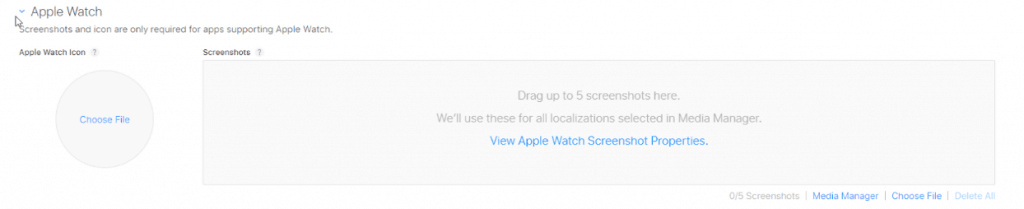
Apple’s wearable device Apple Watch has grown in popularity since its release in April 2015. By developing an app that is compatible with Apple Watch, you open yourself up to a wider range of people.
As the display for Apple Watch is smaller than a normal phone display, you’ll need to design an icon that’s a suitable size but also ties into your app across other devices. Upload your icon in this section.
In this section, you also add in your screenshots for the Apple Watch app. You can have up to five screenshots for the Apple Watch (just like the iPhone/iPad sections). Similarly, the options for the Media Manager, Choose File, and Delete All are also the same. As mentioned earlier, there’s no separate section for the Apple Watch description, as it shares the description defined for the iPhone and iPad.
Read the Apple Watch Screenshot Specifications page for more information.
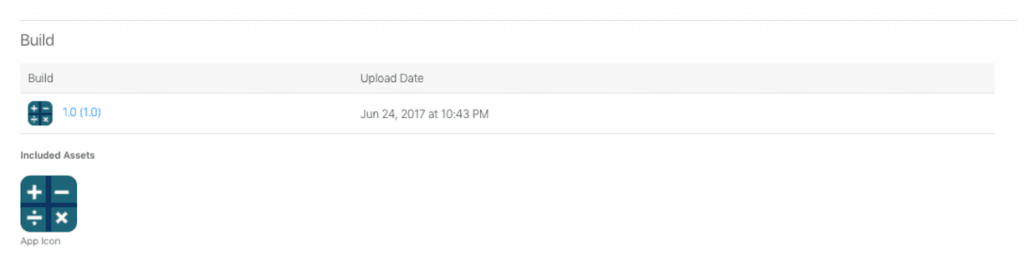
Build
The “build” is the application file that you have produced using your development tool. This is the section where you actually upload the build that will become the public version of your app. You can create the build using Xcode 6 (this is the current version stated) or later. If you are unfamiliar with Xcode, it’s a piece of software known as an integrated development environment (IDE) that can be used to develop apps for Mac, iPhone, iPad, Apple Watch, and Apple TV.
Now, you can use a number of different development tools, or IDEs, to create your iOS build. Once you have created your build, you will need to upload it to iTunes Connect. iTunes Connect is Apple’s portal for developers to manage their apps.
The easiest and latest way of uploading your build is via the Application Loader 3.0 (this is the current version stated) or later. The Application Loader is a hassle-free graphical user interface, which connects to your iTunes Developer account and allows you to upload a new build or add new in-app purchases to a project.
Once you have created your release build, you select this IPA file from the Application Loader, and it will verify that your app is correctly configured to upload. If there are any issues with the information that you have provided, you will be shown these details so that you can fix it. Once uploaded, you will see it in iTunes Connect under the Build section.
This section also shows the build version extracted from the build file you uploaded and the date you uploaded the file.
If you included any assets within your build, these are also extracted and shown here. For example, if you included your app icon, you will see it shown above the version number on the left.
General App Information
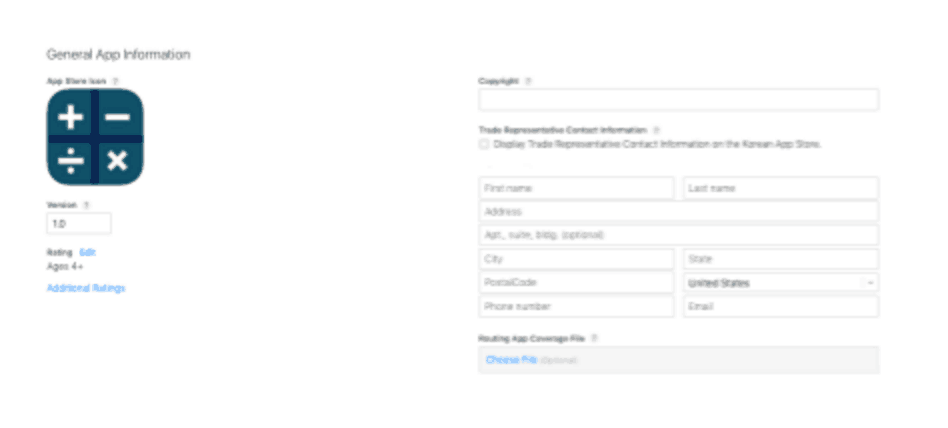
App Store Icon
This icon is the first piece of content from your app that users will come into contact with, so you need to make sure it’s high quality. You also may want to ensure that the image is representative of your app’s core functionality so the audience will know intuitively what the app is about.
For example, the App icon for Google Docs is a document with lines on it. Most software users associate this image with a file, piece of paper with text, or document, which automatically suggests the functionality of the app. Linking your app icon and app functionality will lower the barrier to entry and help you retain users.
The icon uploaded here will be used on the App Store. It must be in the JPG or PNG format, with a minimum resolution of at least 72 DPI, and in the RGB color space. It must not contain layers or rounded corners. Your app icon must also be 1024 x 1024.
For more information, please see App Icon Specifications.
Version
This is the current build version number of the app that you are adding. It is advised that the numbering format follow standard software conventions (usually “major.minor”).
Rating
This section is related to the age rating for your app, not the entertainment tagging that users provide. The rating is automatically calculated for you to make sure that all apps are rated objectively. To get your app automatically rated, you read through a list of categories and check either none (no examples of this occur within your app), infrequent/mild (only some examples occur within your app), or frequent/intense (many examples of this occur within your app) to each option.
Once you have entered an option for all categories, the system will calculate an appropriate age rating based on your answers.
Copyright
This is the name of the person (or entity) that owns exclusive rights to your app. The year the rights were obtained are placed before this name.
Trade Representative Contact Information
This section outlines the contact details of the trade representative contact for your app. It is to provide additional information for the Korean App Store. If you’re a hobbyist or a solopreneur, your contact information will be provided here. If not, you should list whoever handles your business’s external communications.
If you wish for this information to appear on the Korean App Store, then check the box next to the text “Display Trade Representative Contact Information on the Korean App Store.”
If you provide your details in this field, your information will be displayed in the Korean App Store. If you don’t wish to show your contact details in the Store (which is perfectly understandable), you can choose to omit your details. This shouldn’t prevent you from having your app in the Korean App Store, but you should double-check with an Apple representative to confirm.
By default, your contact information is placed within these fields. If you remove your details, you may find that they default back to using your real contact details. The only way to remove your details is to add something like “no address” into these fields. Again, I’m not sure how this will affect your submission and being displayed in the Korean App Store, so you should seek advice from an Apple representative.
If you don’t want your app to be available in the Korean App Store, you need to disable the app within the territories section in the previous screen, “Pricing and Availability.”
Routing App Coverage File
If you would like to specify the geographic regions supported by your app, you can do so by providing a file in the format GeoJSON and uploading the separate GeoJSON file in this section.
Game Center

This option includes your app within Game Center. If you have added in functionality to your app that makes use of the Game Center features, once you enable this option, your build properties that relate to Game Center will be extracted and displayed here.
App Review Information
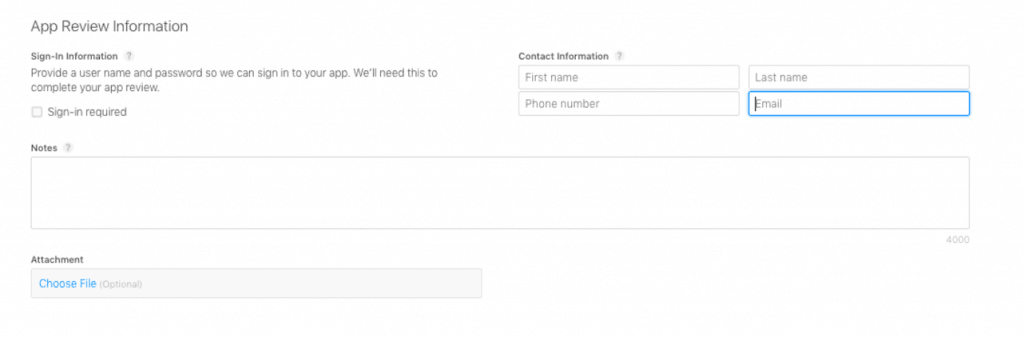
Sign-in Information
If you give users the option to sign into your app using a particular social media channel, Apple will need a social media account to test this, enter your app, and test its functionality.
In order to proceed through the review process, your username and password credentials for any social media accounts you want to be tied to your app must be valid and active for the entire review process. If they aren’t, your app will be denied and you’ll have to start again.
If you want users to sign into your app, check the “Sign-in required” checkbox and provide a username and password in the hidden fields.
Contact Information
You need to include the contact information of the person the App Review team should contact if they have any questions or need additional information during this process.
Notes
This section can be used to provide any additional information about your app that can help during the review process. Include any information that may be needed to test your app, such as app-specific settings. Providing these here may speed up your review.
Version Release

After the app has been approved, Apple can release the app straight away if you check the option “Automatically release this version.” However, most publishers that aren’t hobbyists usually have a marketing strategy with a whole release timeline etched in stone so that they can build anticipation for their product.
If this kind of plan is what you have in mind (albeit maybe on a smaller scale), you may want to choose the option “Manually release this version.” To delay the release of the app until a certain date after it has been approved, you can choose the option “Automatically release this version after App Review, no earlier than [provide your chosen date].”
The earliest date your app will be made available on the App Store is based on your current time zone. If the App Review process isn’t complete by this date, the version will be made available directly after it has been approved. So if you want to maintain control over the release of your app, make sure you allow for ample time between submitting for review and getting your app approved.
Once you have submitted your app, it will be set to the “Processing for App Store” state. While your app is in that state, you can’t get new promotional codes, invite new testers, or reject your app. You can upload a new build, though, in case you missed something small but significant.
After it has been approved, the app will move to the “Pending Developer Release” state. Once it is in this state, you’re able to generate and give out promotional codes, continue beta testing, or reject the release and submit a new build (because, you know, accidents can happen).
So that’s it!
I’ve shared with you everything that I’ve learned so far about how to create a great App Store page.
Having this page configured to a high quality will put you ahead of the competition. You’ll drive more traffic to your page and downloads of your app will increase. But actions make all the difference. Make sure that you put what you’ve learned into practice as soon as possible.
Once your page is live, it’s important to check how your page is doing by looking at the analytics surrounding your page.
The algorithms that Apple and Google use when listing your app within search results change all the time to make sure that no one publisher remains on top.
Because of this fact, you will need to adjust the content of your page accordingly to try and make sure you keep getting a high amount of pageviews and hopefully downloads.
It’s not easy sailing from here, but you’ve done a great job in getting this far.
Good luck with your release!

Related Articles

12 REALITIES of Daily Life as a Programmer
What’s the daily life of a programmer like? A programmer’s daily life consists of auditing and debugging code, coding new…

13 POWERFUL Productivity Tips for Developers
Great productivity is one of the best soft skills you can have as a developer. I’ve used these tips to…
Impostor Syndrome as a Programmer
Believing that you’re somewhat unqualified for your job is a problem faced by the best of us. When those thoughts…